
We made a motion graphics template that you can use for everything. Now we’ll show you how to use it.
Over time, we started to notice that there are certain types of animations and graphics that we use all the time. Little slick titles with animated lines and shapes with eased smooth keyframes and a bit of motion blur. These things don’t take a horribly long time to make in After Effects, but when you need to do it often enough, it starts to add up. Not to mention, you might not know how to do these things in After Effects at all.
This is why we created SuperMOGRT.
We made a “How To “video that’s more helpful than our writing, but hey, if you wanna read instead just keep on scrolling.
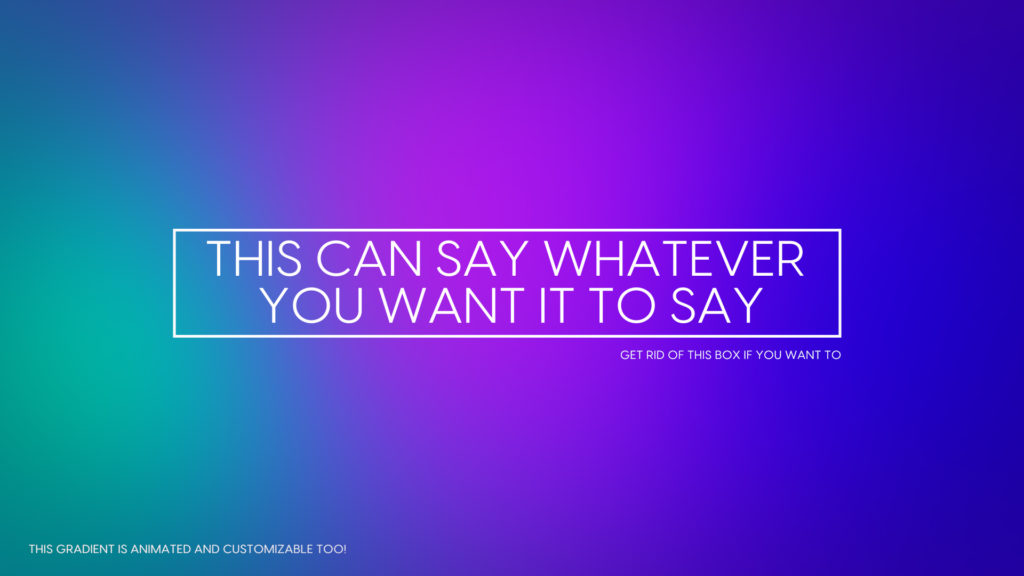
SuperMOGRT is a .mogrt (motion graphics template) file that you can use directly inside of Premiere – no need to go into After Effects. This means that you can quickly go in and throw together some pretty fun looks with some really slick animation in no time, whether you’re a motion graphics designer or not.
.Mogrt files have been around for a few years now, and they’ve really changed our workflow in just about every way. That’s coming from someone who has been an After Effects user for their entire career. If you’ve ever used them, you know that dynamic linked comps between After Effects and Premiere can really bog down and slow down the edit process, and leave you somewhat limited once you’re back inside of Premiere.
Prefer to have a nice clean .mogrt file that you can just drag and drop into the timeline? We do too. It keeps everything nimble, fast, and fun.
If you’ve never used a .mogrt, read the breakdown below to get started, the above video is probably a more thorough introduction though.
What Is a .mogrt File?
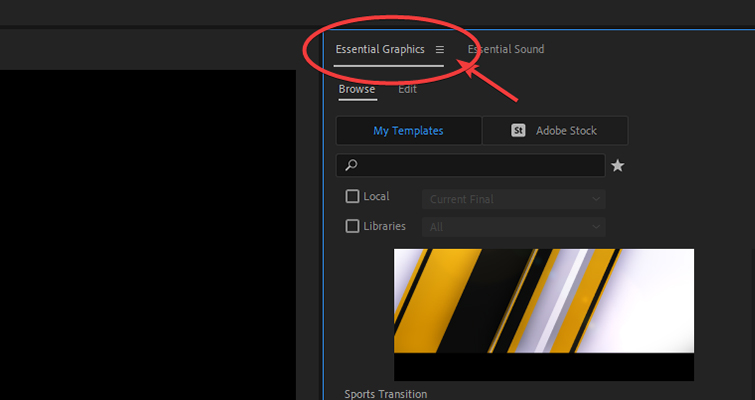
Mogrt is short for Motion Graphics Template. A .mogrt file is an animated template that is saved from After Effects with specific supported parameters and effects enabled for Premiere. You can open .mogrt files in Premiere Pro from inside of the Essential Graphics Panel.
How To Install SuperMOGRT
There are a few different ways to install SuperMOGRT.
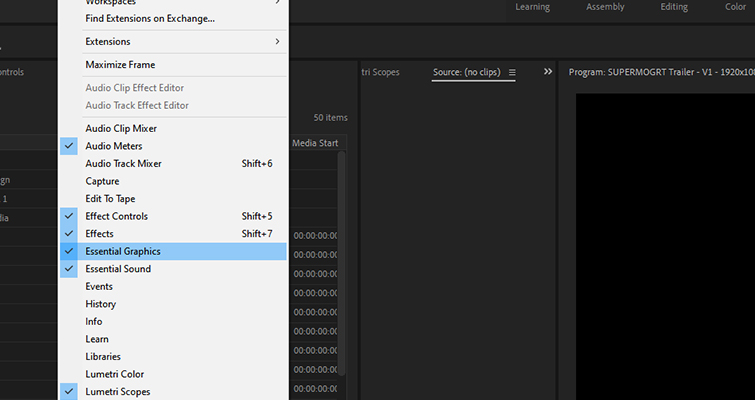
To use and customize a .mogrt file you need to open the essential graphics panel inside of premiere. You’ll find this in the window tab at the top of Premiere. Make sure the Essential Graphics Panel is checked, and it will appear somewhere on your workspace (pictured above).
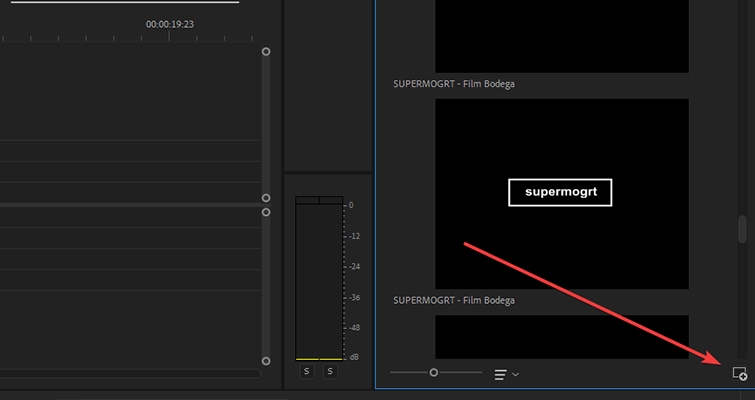
One of the more straightforward ways to install a .mogrt is to click the button in the bottom right corner of the Essential Graphics Panel. This will bring up a dialog where you can just easily select your desired .mogrt.
Alternatively, even more straightforward – you can just drag the .mogrt file directly into the Essential Graphics Panel and it will be installed.
My favorite way to install .mogrt files is by using my own local libraries. This allows you to have multiple folders of various .mogrts and select through them in an organized way. To do this, click the hamburger icon (pictured above) at the top of the essential graphics panel.
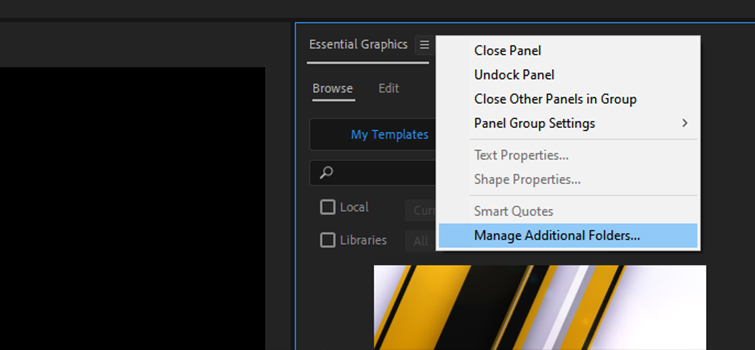
From here, select the “Manage Additional Folders” button. This is where you can decide which graphics you’re going to want to use for this particular project, and it will keep them all in their own specific areas, instead of mixing them all together with Adobe’s stock .mogrts and whatever else you’ve already installed.
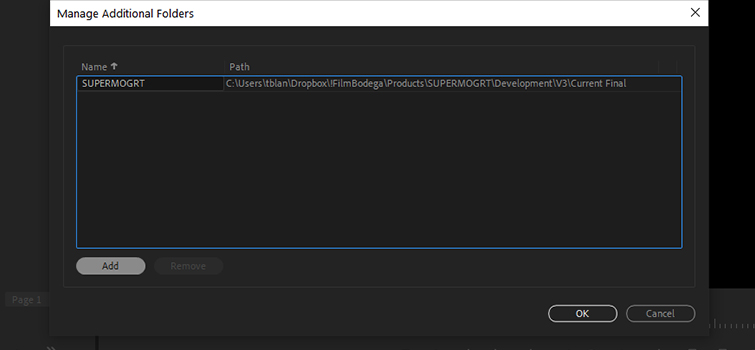
Here, you can select as many folders as you want. Just click the add button and find the folder where you have SuperMOGRT waiting and ready to go. I have multiple folders of various .mogrt files here so that I can select them at will.
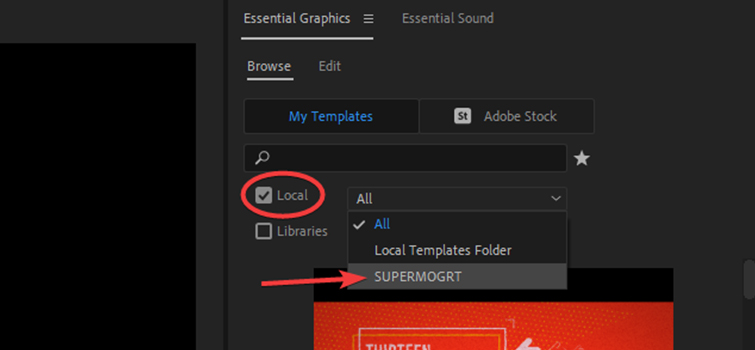
After this, back in the browse tab you’ll click the checkbox next to “local” and then use the dropdown to find the folder that you’ve added. After selecting the folder, you should see SuperMOGRT.
How To Use SuperMOGRT
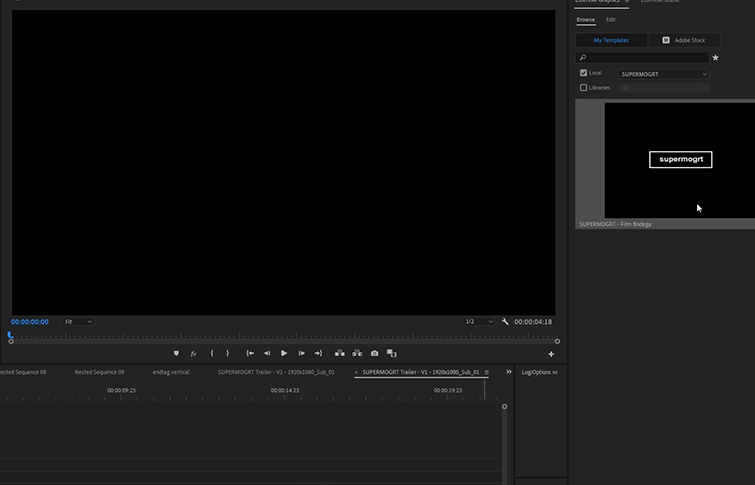
To use SuperMOGRT simply drag it from the EGP onto your timeline. It’s that simple.
From here, it will load the graphic in it’s default state and you’ll be off to the races.
To customize your graphic, you just click on the instance of SuperMOGRT in your timeline and it will change over to an “Edit” tab inside of the Essential Graphics Panel. This is where you will do all of your customization.
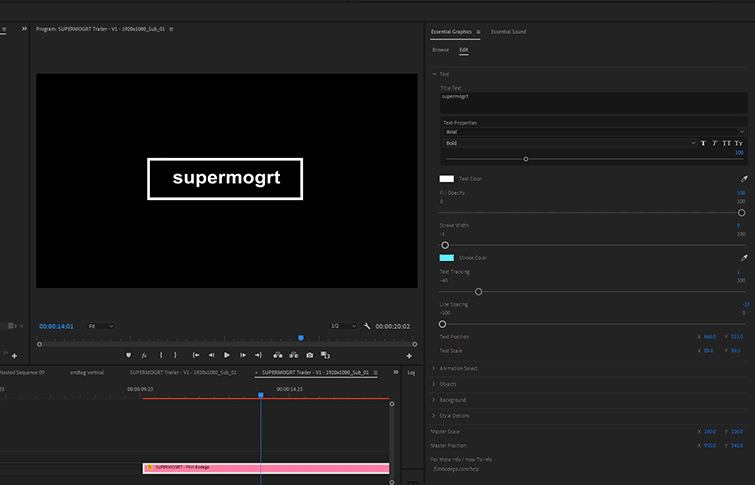
Once you’re inside the edit portion of the EGP, you’ll find all of the necessary toggles and parameters you need to make the graphics that you wanna make.
Make sure you only have one animation selected at a time (if this is the desired look), as each checked portion will create a duplicate of the text element.
Experimenting With SuperMOGRT
The number one piece of advice I can give about using this graphic template is to experiment with it. I really started to unlock the power of this thing when I start to stack them on top of each other and create layers of animation. For instance, I love to keep the background on it’s own layer, and stack a couple instances of shapes and text on top.
Another thing to note is that as you add .mogrt files to your timeline, you’ll notice that playback will get pretty choppy. It’s recommended that you render out your timeline as you go, so that playback goes nice and smooth.
Just play around with it, and bend it to your will – I’ve found that I can get pretty much any look I need with this template if I play around with it and find some creative ways to use what’s in there.