Save so much time, energy, and hard drive space when you use Creative Cloud libraries.
Every once in a while, you’ll be working on something and the person over your shoulder is totally blown away by something you did. There are so many tiny workflow hacks and tips that everyone picks up over time, but there are also so many that many don’t even know about.
Just the other day, Todd saw me add a Prism Bokeh effect inside of Premiere Pro and was blown away that I didn’t have to import the asset from a folder on my computer or external hard drive. You see, I save all the assets I use all the time in Creative Cloud libraries which let’s me access these files from any machine as long as I am logged into my Creative Cloud account. In fact, you can create shared libraries to use with everyone at your company or even with clients and freelancers (just make sure you have the license to use the assets company wide).
What are Adobe Creative Cloud Libraries?
Adobe Creative Cloud libraries are a feature you get with your Creative Cloud account. It actually works across multiple apps so you can easily access and manage design assets (colors, character styles, graphics), video assets (logo animations, motion graphics, SFX, video overlays) and other creative elements across different Adobe tools. Libraries help streamline workflows by providing a centralized location for storing and organizing assets that can be shared among team members or accessed across multiple projects. Users can create libraries for specific projects or themes, collaborate with others by sharing libraries, and sync changes across devices. This feature enhances efficiency and consistency in design workflows, enabling users to quickly access and apply assets without the need to recreate them from scratch.
How do you make these libraries?
You can create libraries on your desktop or mobile device. I find it easier to create libraries on my desktop for larger files like the video overlays. On my phone I’ll create libraries when I use apps like Adobe Capture or Photoshop’s PS Express mobile app.
Let me run you through how I add video overlays.
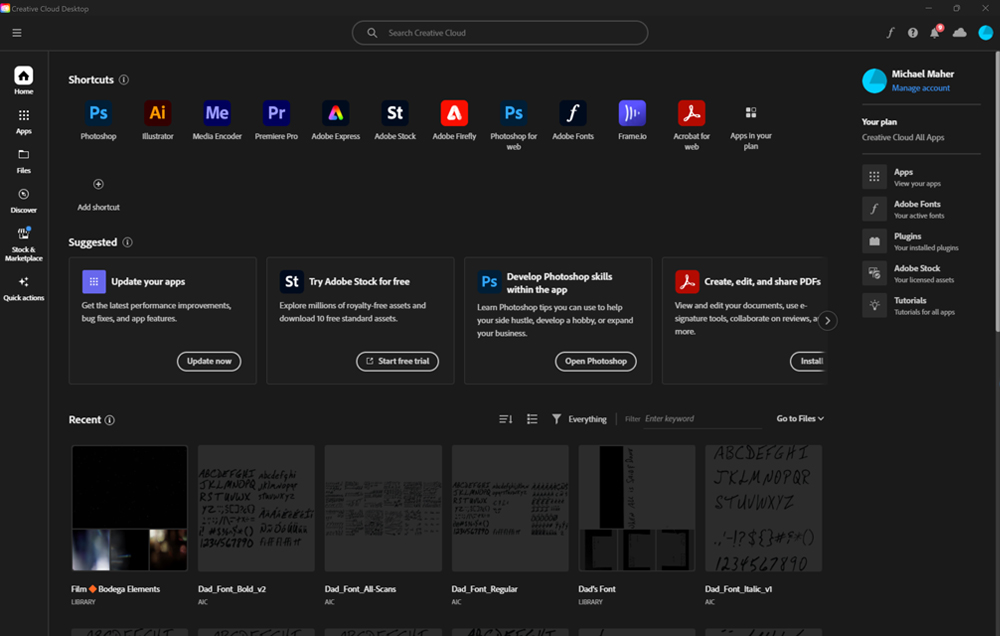
Open the Creative Cloud Desktop app on your machine. It’s the same app you use to download the software.
On the left-side menu, navigate to Files.
Here you will find the files you saved in the cloud, shared files and libraries, and your own libraries.
Open Your libraries. There you can pick from existing libraries you have, or you can create a New Library. Let’s make a new one.
Name the Library what you want, in this case mine is called Film Bodega Elements. I am going to store all my 6K video overlays and motion graphics here.
Now you can just dump everything in here at once, but the Atmospheric Essentials bundle alone has over 150 elements, and I like to separate them by category. So on the left side, you can create a group and then make folders for each types of asset. You can customize these however you want.
I have groups for each pack, so when I need to add them to a project I can find them quickly. Create a group and upload your assets here.
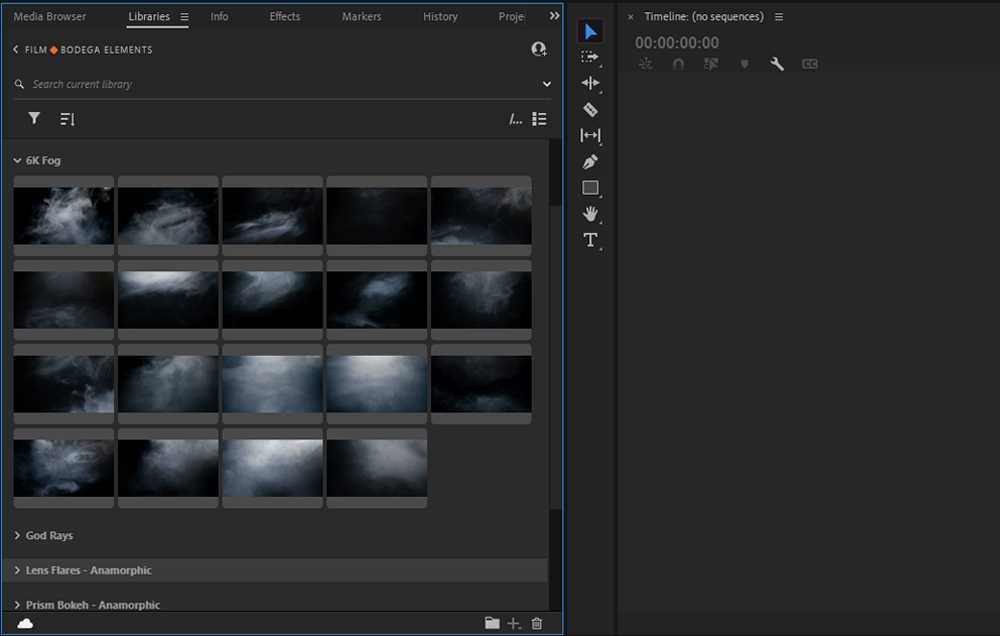
For example, here’s the 6K Fog folder where I just added all of the fog element files.
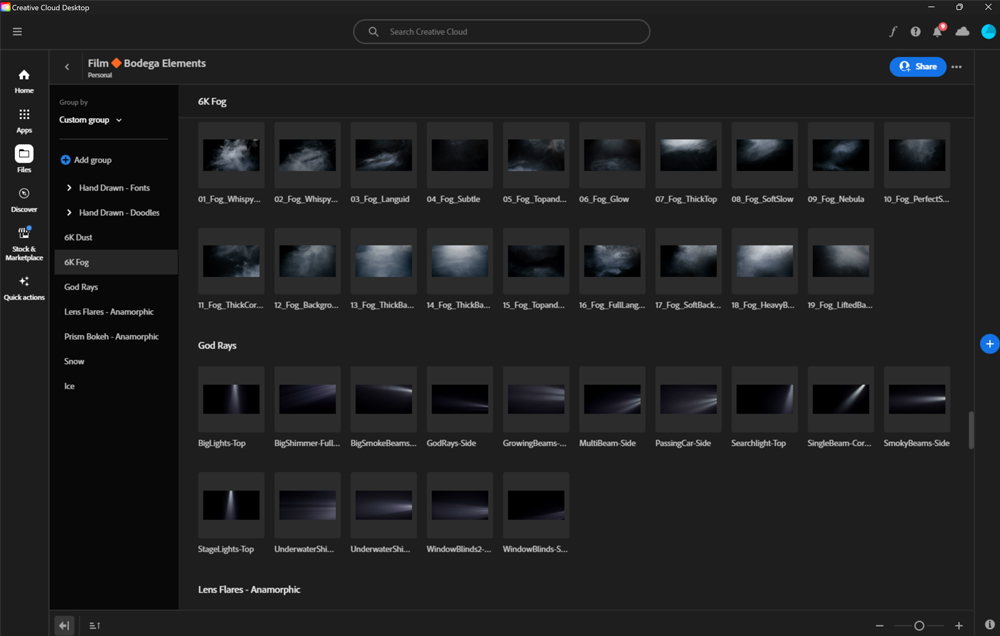
Just drag and drop all of the assets you want into these folders and organize them however you like. Once they are in the Creative Cloud library, you’ll be able to access the within each of the various apps.
How to use your favorite video overlays, effects, and sounds in libraries.
So now you have libraries built in Creative Cloud. On my machine, the one I use the most is my Film Bodega elements folder. It’s where I store everything from the Atmospheric Essentials bundle to the Hand Drawn doodles and animated fonts.
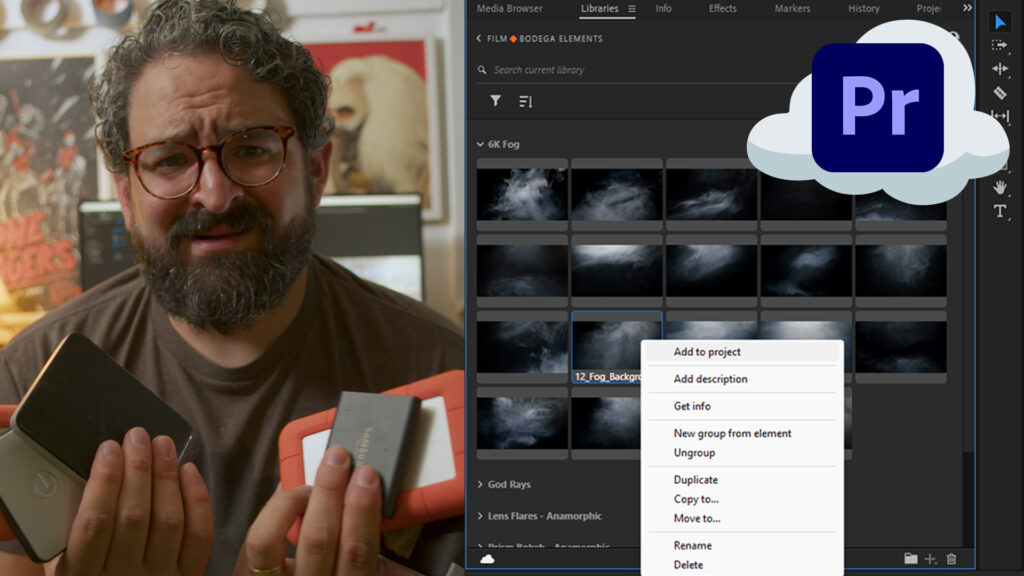
Inside of Premiere Pro, next to you Media Browser tab, you should see the Libraries tab. This is where you fill find all your cloud libraries. I’m going to navigate to the Film Bodega elements folder and then you will see all of you clips.
Now since these are stored in the cloud, that does not mean they are in your project yet.
So you can’t just drag them into the timeline, but it’s still crazy simple. Just find the specific file (or files) that you want, right click on the asset, and select Add to project.
This will automatically import the clip and now you will see it in your Project folder to use in your edit. Now just drag it into your timeline.

If you have never used our video overlays before and are wondering what the heck I’m talking about, here’s a helpful tutorial.
More types of libraries you can build.
You also aren’t limited to just using video clips and sounds. You can save just about anything. Images, mogrts files, Illustrator scans, textures, 3D models, and so much more. It’s like have a version of Dropbox built into your Adobe program of choice, and you can access these assets from anywhere.
I still have a library dedicated to all the Shape scans I made using Adobe Capture to create the free hand drawn Bodega Jack fonts.
Now you don’t have to go hunt down files, download Dropbox files, or figure out which hard drive had all your stuff one it.
Build a Library with these 6K video elements
Do you want to copy my library? You can get the assets I use all the time with the Atmospheric Essentials bundle. It has my favorite video overlays that I use all the time in nearly every project.