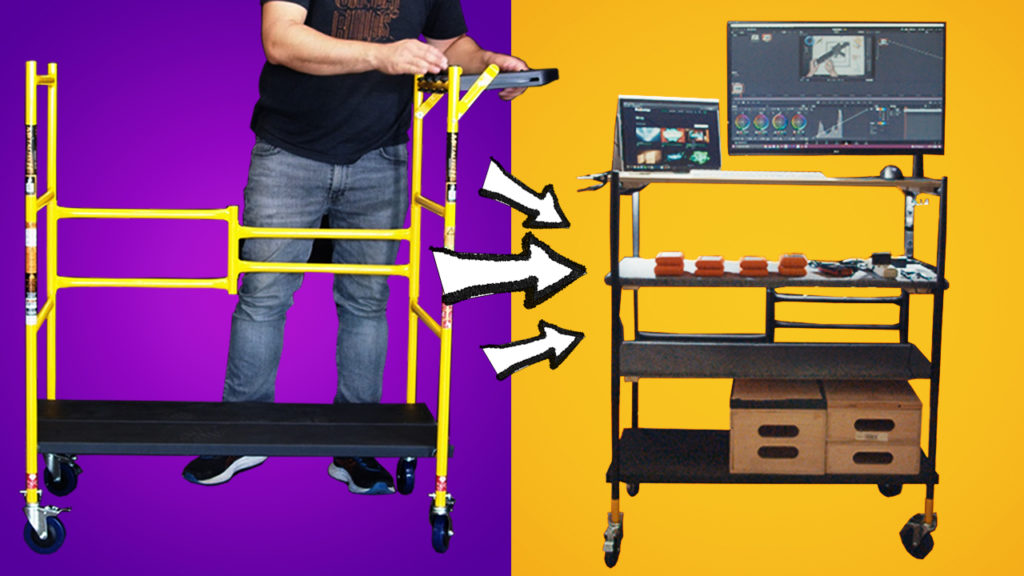
It’s compact, it’s cheap, and it’s easy to build. This is how you can build your own mobile workstation and camera cart without breaking the bank.
This is one of those life hacks that you just kinda put off, and once you do it you regret not doing it sooner. I wanted a new way to both conveniently transport gear and have a mobile workstation to use on location. I looked into buying a proper production cart, which I quickly realized I couldn’t afford. So I decided to go the DIY route.
You can easily create your own variations based on this build, and I’ll even breakdown 3 builds you can put together for around $100, $200, and $300.
Building Your Own Mobile Workstation
In the past I’ve built a custom Rubbermaid cart. It’s just a big plastic rolling cart that you can add shelves or things to. As a cart solution, it’s great. It’s still used by all sorts of crews from grips to makeup. The downside is that it doesn’t collapse and it takes up my entire trunk. You also needed to add better wheels, and depending on how big those are, then the cart might not fit at all.
Todd has a RocknRoller cart that we’ve used on location many times. It’s a great solution, but I wanted to see if I could find something that didn’t take up as much space in the trunk and could be easier to setup as a workstation. RocknRoller makes attachments and shelves, but I just found the overall solution to be both time consuming to setup and still kinda wobbly when built out. You could also convert a traditional Magliner handtruck, but same as the RocknRoller, it’s still just a little too big to fit in my car with all my gear.
Now let’s go back to why this particular solution exists. I needed something that could collapse and easily fit in the back of a little SUV. I went down a rabbit hole of custom filmmaking carts (which are all amazing) but one build really caught my eye.
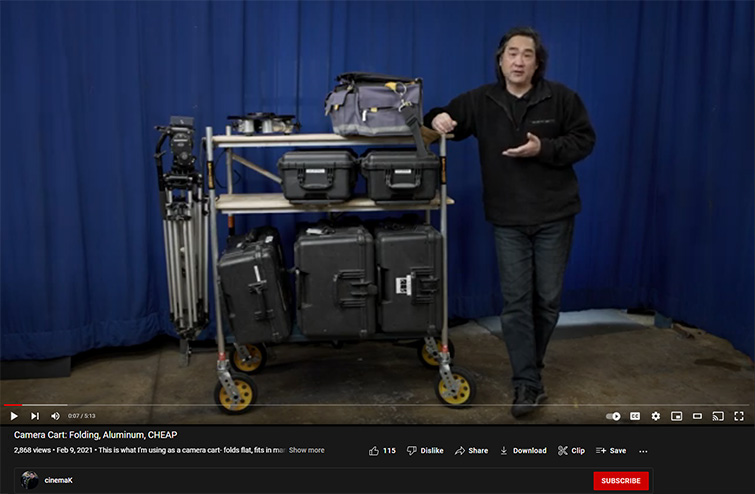
Now, I remember watching this cinemaK tutorial about his cart build using scaffolding. He just added a few shelves, threw on some better wheels, and called it a day. It was a great solution. Now, the downside is that he’s said the cart did hit a pothole and one of the legs bent in. So it’s not a crazy robust solution, but for a simple build that I’d likely use in a studio environment 90% of the time, this build just made too much sense.
Since I first watched that video, several other similar tutorials have popped up, and further showed several different ways you could build a camera cart using the same scaffolding. Some using a variation of the scaffolding with a top bar like the build from Aram Atkinson, and another using the same scaffolding I went with from Endure Films. Both of those builds kept the included plastic shelf, but I knew I wanted to take that off and free up space to add another shelf up top as my computer station and camera assembly shelf.

Three Ways to Build Your Own Camera Cart
So as I’ve used this cart, I’ve continued and will continue to make modifications. That said, you don’t have to do everything at once, and if you just want to get started, all you need is the scaffolding and maybe some spray paint.
No tools are required to assemble the scaffolding on its own, but you will need tools to make modifications and to build shelves.
Tools Needed:
- Saw
- Glue
- Hammer
- Screwdriver
- Sandpaper
The Bare Bones $100 Build
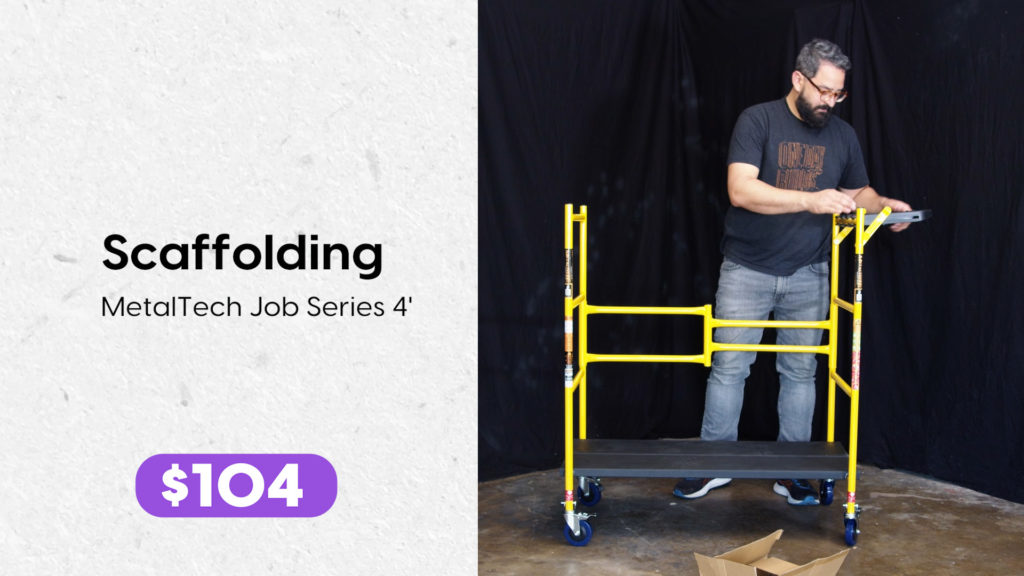
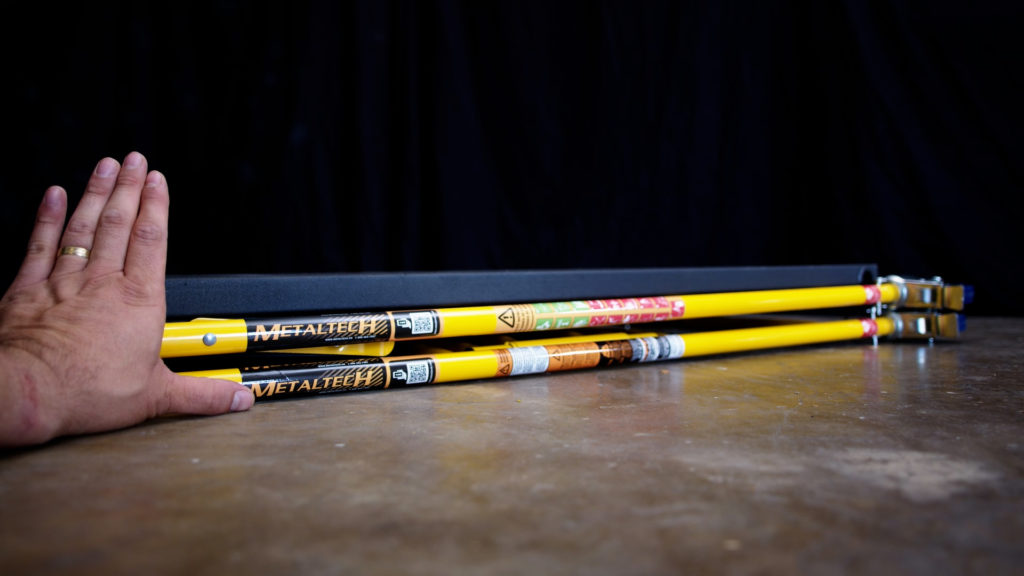
For just over $100 you can get started using this collapsible scaffolding. I am using the MetalTech Job Series 4′ from Home Depot. There are a few options, including one with a top bar, but I’m using the base model with costs $104.
This is the exact setup we used on that first shoot mentioned in the video. I’d recommend that you go ahead and get two cans of spray paint and some sandpaper and paint the unit black. Shouldn’t cost more than an extra $10-$15.
The scaffolding comes with a fold out plastic shelf and two metal steps that can be used as a shelf. No tools are needed to assemble the scaffolding, you just unfold, add the wheels, place the shelves in and you are good to go.
The Custom Shelving $200 Build
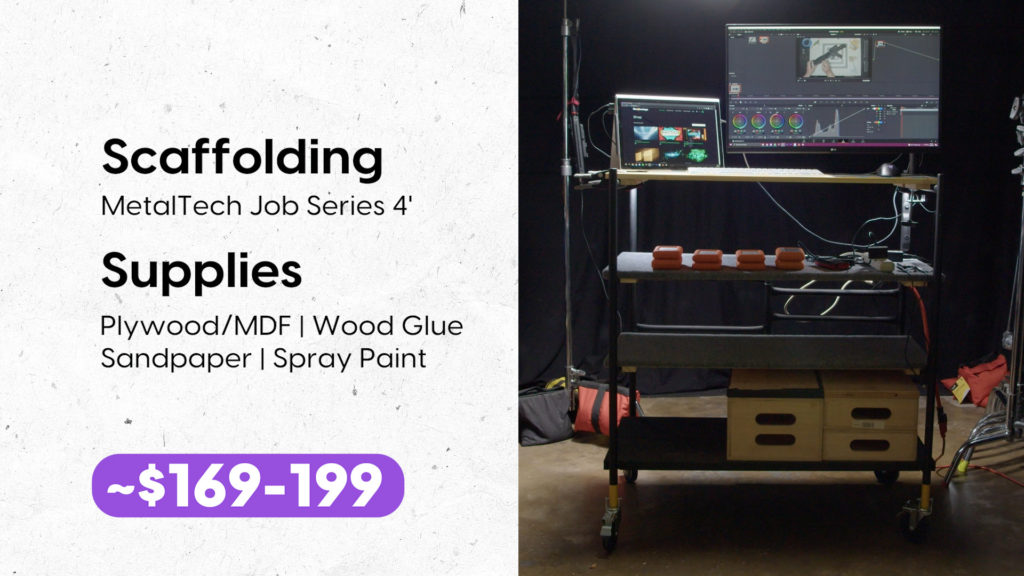
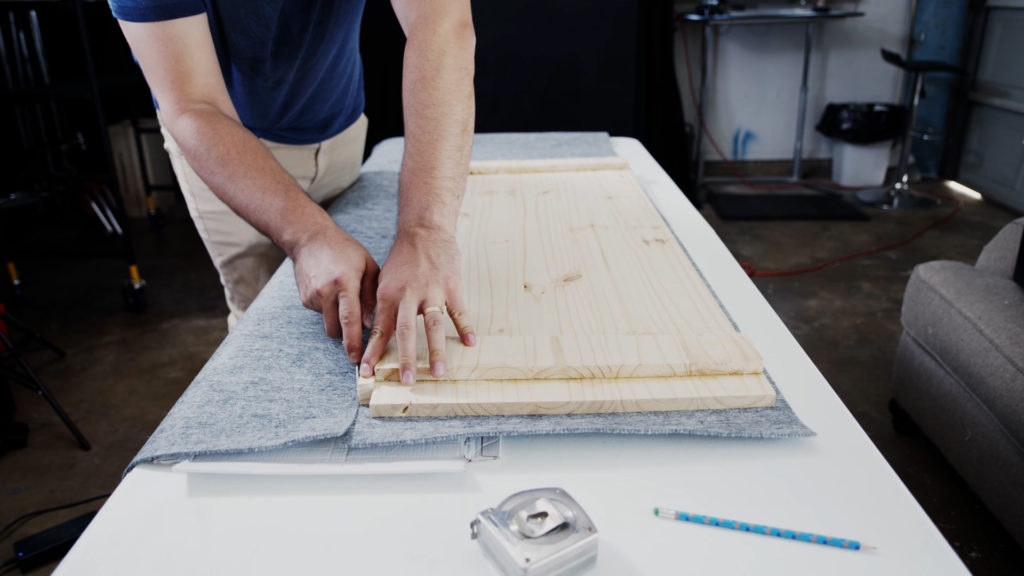
This build is the real sweet spot, and where you should definitely start. You can add up to three shelves on the cart if you remove the included plastic folding shelf. I went with wood shelves since they were stronger and lighter. For a cheaper option you can use a composite board like MDF, but you will both need to trim the to the right size which is tough to get straight, and MDF is a lot heavier.
You definitely want to go with something around 1/2″ to 3/4″ inch thick so the shelf doesn’t bend or bow in the middle. My shelves are 3/4″ thick and are 41″ long x 18″ wide.
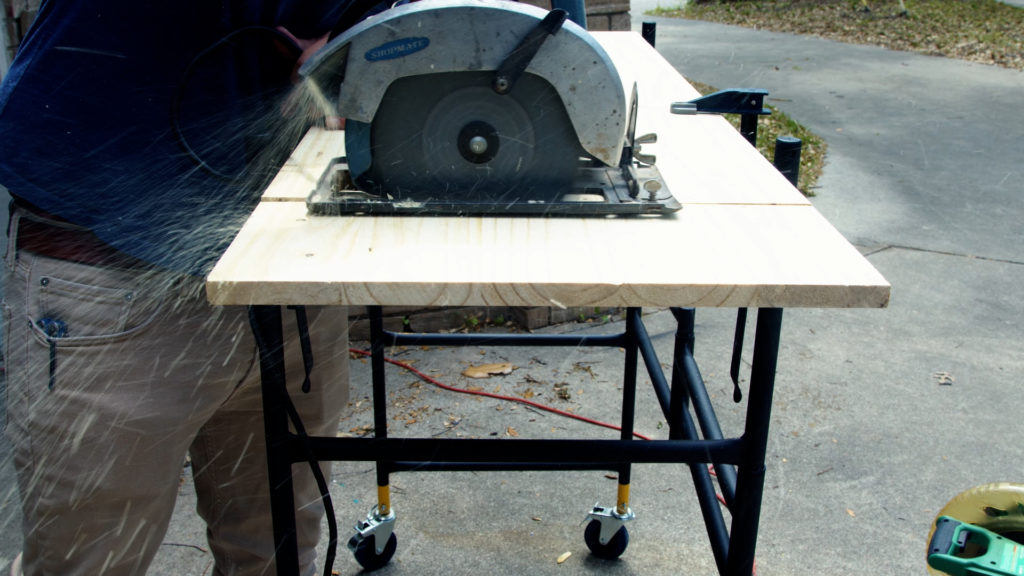
I purchased three 18″ wide boards that were 4 feet long because I didn’t have access to a table saw to cut them all down from one sheet of plywood. I used a circular saw to cut down the length, and then used a miter saw to cut down the excess wood into supports that locked the shelves in place.
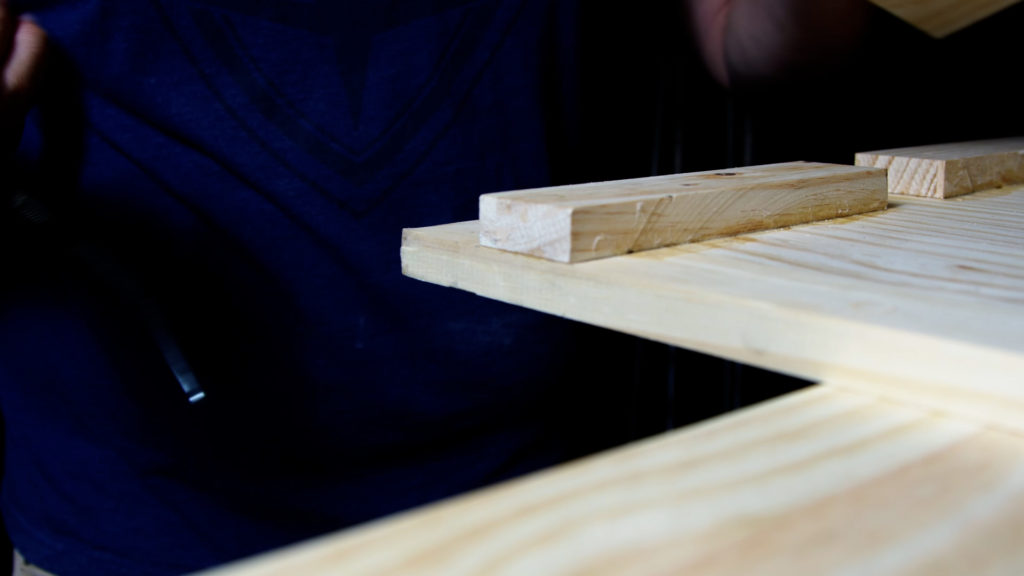
Here’s a pro tip I learned. This unit is not perfectly square. On the first shelf, I just used one long support on each side. It does the trick, but you can get a better lock on the shelf if you use 4 supports instead since the shelf is a little offset. Before gluing them on, I used spring clamps to lock them in place and then marked the best fit.
Then I cut a cheap area rug to the length and width or the boards, you want to leave a little bit of excess on the sides to cover as well. I had a piece of scrap from the supports that was super handy. Turn it on it’s side since the width is the same as the board. Run that along the edges and cut as you go. This will give you the perfect amount of rug along the edges so you won’t have to trim excess after the fact.
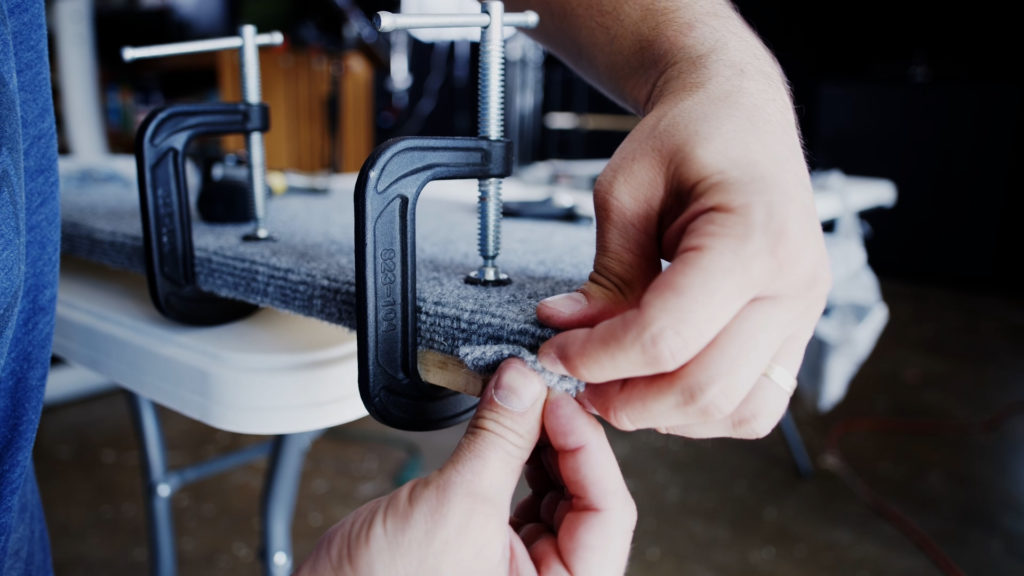
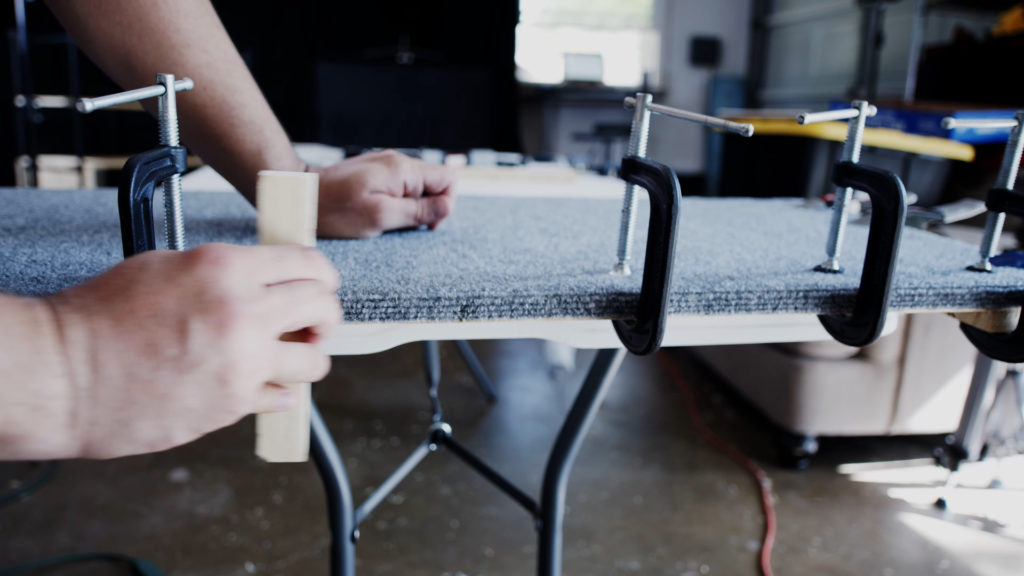
Once cut, glue down the carpet along the top and sides and let the glue dry. For the corners, I just folded them in and used a nail to hold it in place. I used that same scrap piece from earlier to run along the top and side to make sure the glue was getting a good bond and I set c-clamps along the side to make sure it dried properly.
These shelves can be used in any configuration, I tend to use the heavier scaffolding as the base shelf, then two carpeted shelves in the middle and a bare wood shelf on top. You can also remove any shelf for bigger pelican cases or to lay c-stands across.
The “Pro” $300+ Build
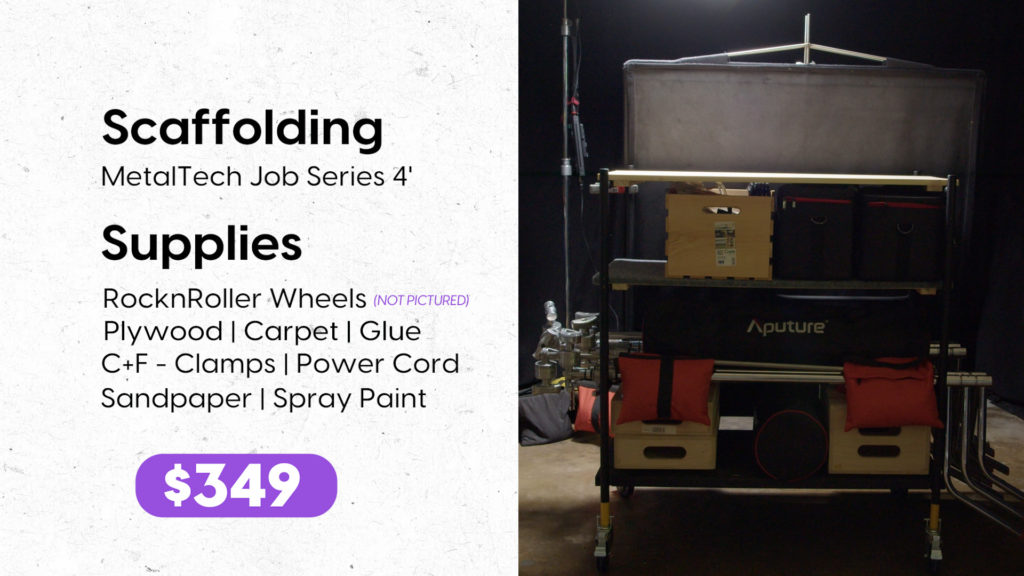
The next big addition to the cart will be new wheels. I’ve returned the initial set I purchased, and decided to go with 4 RocknRoller wheels with locks. They come in sets of two for around $90, but if you shop around you can usually find sets for a little cheaper. I will need to modify the stems slightly to get them to properly fit, so I’m hoping that doesn’t effect the integrity of the wheel.
One thing to note is that the new wheels will make the cart a bit taller as well, so depending on your height the top shelf may not be the most comfortable to work on as a editing stations. The good thing is you can always take it off and use a lower shelf. To save some space and add some versatile viewing options, I’m using a clamp stand for my monitor. The one I’m using was about $30 on Amazon.
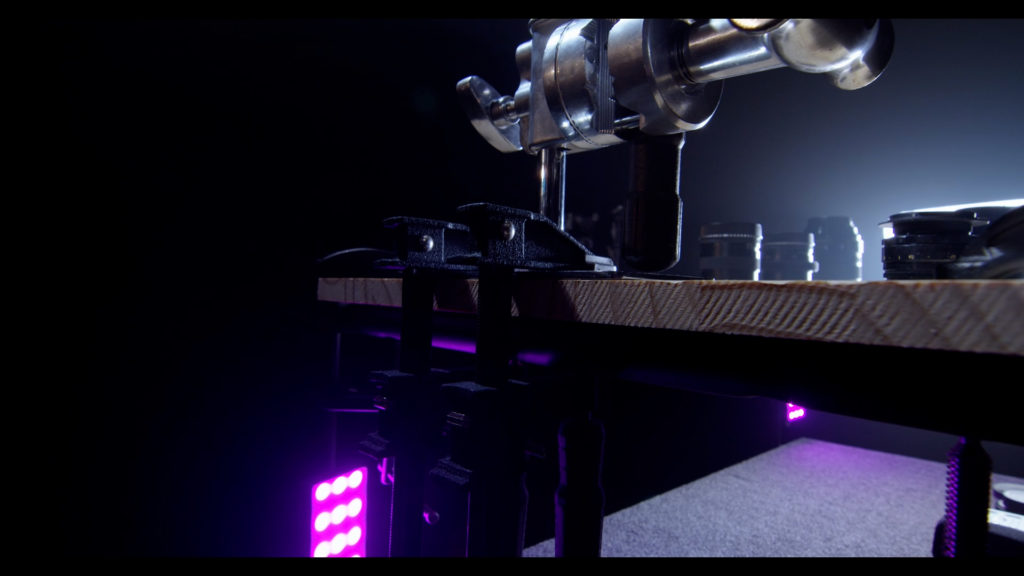
In addition to that, a few other things I’ve used frequently on the cart are c-clamps to lock the top shelf in place, bongo ties to keep an extension cord and surge protector attached the cart, and a baby pin adapter locked into place with f-clamps.
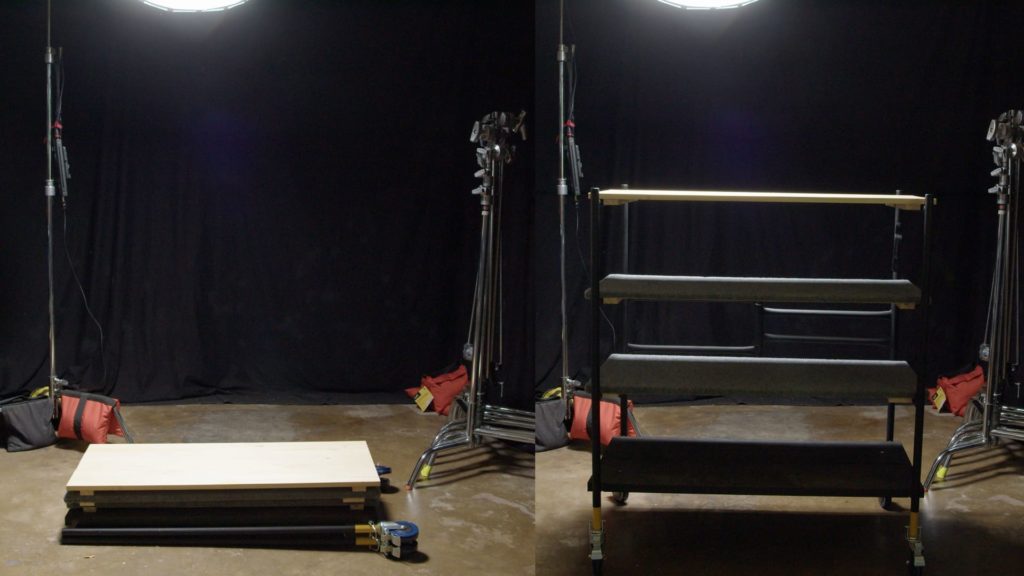
Truly Collapsible
The last thing to mention is how compact this thing collapses too. When you take just the scaffolding and you fold it in on itself and this is using the wheels, it’s super flat. Then you just put your shelves on top of that. When I’m laying it out in the trunk, it’s literally just scaffolding and shelving. ThenI have a flatbed to load everything on top of and I don’t have to worry about shoving things into places. It makes for a super nice way to fill up your trunk.

Well, that’s it for the build. If you build one like this, be sure to share it with us. We want to see what you guys make. Share it with us @film_bodega on Instagram and Twitter. I would love to see if you make one, if you already have one or what your DIY carts are.
One of my favorite things of any like filmmaking group or meme account is when the crew start sharing their DIY cards because they’re incredibly inventive and smart and cool.